We have created a fully responsive template for your questionnaire that will look good on any device. How great is that? But you probably also want to give your questionnaire your own look & feel. That's where the Template tab comes into play. This feature will enable you to customize the template to your liking. This article will explain all the different options and features available to you.
Open your questionnaire, and use the tabs on the top of the page to open the Template settings. You will see the following page, that can be divided into four main areas:
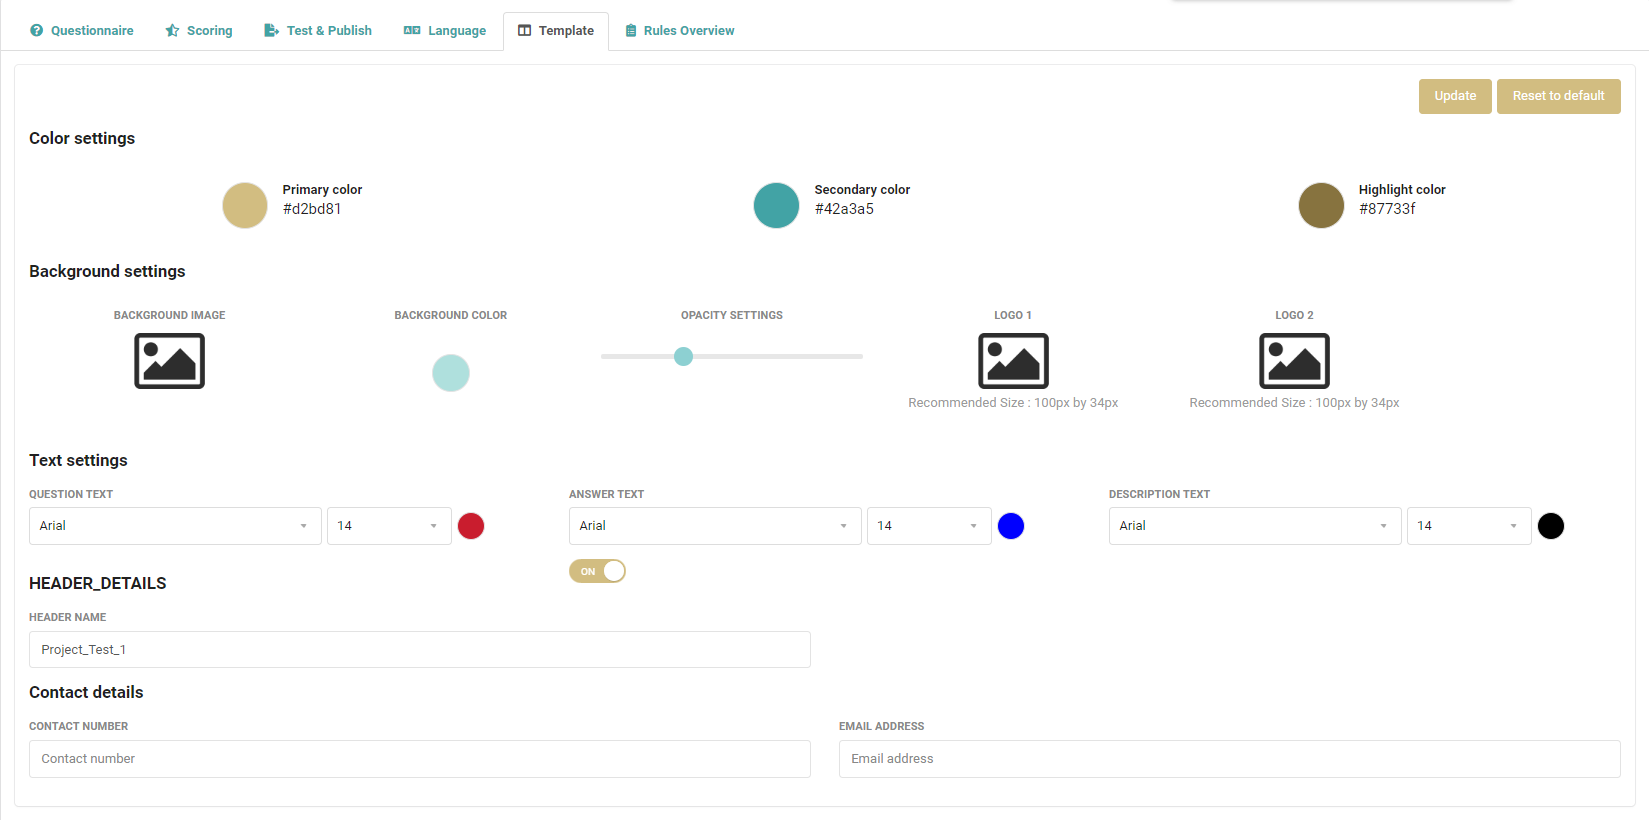
- Color settings
- Background settings
- Text settings
- Header details
- Contact details
Color settings
You can use these settings to adjust the main colors of your questionnaire in the respondent view. There are three levels defined:
- Primary color
- Secondary color
- Highlight color
Clicking on the circle to open a color palette to pick the desired color. Another option is to fill out the HEX code to specify your color.
Background settings
You can use these settings to adjust the background of your questionnaire in the respondent view, with the following options:
- Background image: click on the image to open the media library, select the image you want to use and click Add. If you want to remove an image, hover over the image and press the remove icon.
- Background color: if there is no background image uploaded, this is the color used for the background.
- Opacity setting: by adjusting the slider you can select the opacity level you want to apply to you background picture.
- Logo 1: here you can upload the logo used in your questionnaire in the top left corner.
- Logo 2: here you can upload an additional logo that is used in the top right corner.
Text settings
You can use these settings to adjust the font, the size and the color of your texts. You can differentiate the text design on three different levels:
- Question texts
- Answer texts
- Description texts
Our article on Question pages explains more on where these texts are displayed.
Header details
You have the option to display a header name inside the questionnaire or form. This header is centrally aligned at the top of the questionnaire. By switching the toggle to on the header name you fill in the text box will appear.
Contact details
You have the option to include a phone number and an e-mail address, which will be displayed to your respondents in the footer of the questionnaire.
This way, they have an easy way to reach out to you with any questions they might have.
Update
After you have made all the desired changes in the settings, you can use the Update button in the top right corner to apply all your changes to your template. Please note: your changes are applied to the Edit version of your questionnaire. You first need to put this version into Live mode in order to apply the new template to your questionnaire in the respondent view.
Return to default settings
If you want to return to the default settings, simply use the Reset to default button in the top right corner to delete your changes and apply the default template again.