When you create a questionnaire, there are four types of information pages automatically created for you. These so-called system pages are required for your questionnaire to function correctly.
The four information pages that are always present in a questionnaire are: Start page, End page, Completed page and Time elapsed page.
You also have the option to add general information pages to your questionnaire. These can be used to explain certain parts of your questionnaire or share any type of information you want to with the person who is completing the questionnaire. You can choose Information page when you add a new page to your questionnaire.
By default, these pages are empty. You can design them to your liking and add any text or image you want and even add video or audio.
To help you on the way with your creativity, CYS provides you with several basic templates which can be easily implemented into your questionnaire. The templates can be found here.
In this article we will provide you with a short tutorial on how to implement html templates into your questionnaires.
Table of contents:
Template structure
After you have downloaded a template to your computer you can preview it by opening it in a web browser, simply double-click it. Don’t worry if the preview of the template looks a bit basic. Most of the styling is done by the portal itself.
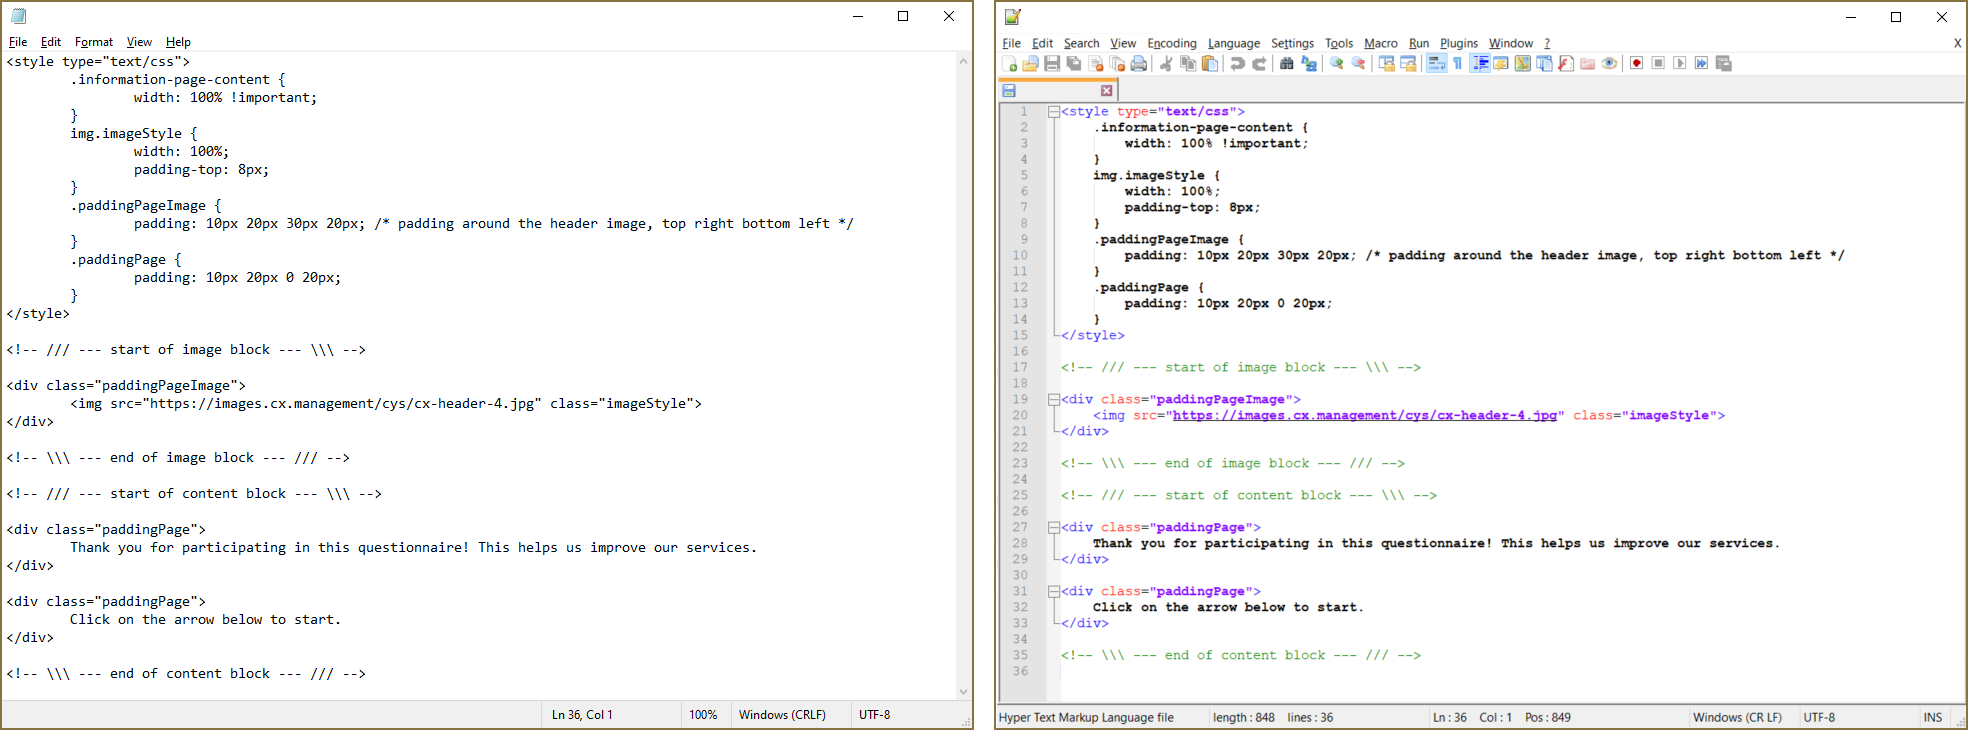
Open the template file in a text editor like Notepad to edit the code. We recommend using Notepad++ to edit the code. Notepad++ displays text and source code in different colours, which makes using it to edit the template source code very easy. The screenshot below shows the same file opened in Notepad and in Notepad++.
Notepad++ is a text and source code editor for use with Microsoft Windows. It is distributed as free software and can be found here: https://notepad-plus-plus.org/
The structure of each template is basically the same. The template is made up out of one or more HTML blocks and starts off with some internal CSS rules.
CSS
CSS stands for Cascading Style Sheets. A lot of styling like fonts and font size is already done by the portal itself. Because of this, not a lot of styling is needed to make your page looking good.
<style type="text/css">
  .information-page-content {
    width: 100% !important;
  }
  img.imageStyle {
    width: 100%;
    padding-top: 8px;
  }
  .paddingPageImage {
    padding: 10px 20px 30px 20px; /* padding around the header image, top right bottom left */
  }
  .paddingPage {
    padding: 10px 20px 0 20px;
  }
</style>
A CSS rule consists of a selector and a declaration block. The selector points to the HTML element you want to style. The declaration block contains one or more declarations separated by semicolons (;). Each declaration includes a CSS property name and a value, separated by a colon (:). We will go through each CSS rule briefly.
- The first CSS rule, information-page-content declares that the complete width of the questionnaire window should be used. This rule is present in all the HTML questionnaire templates.
- The second CSS rule, img.imageStyle declares that the image element should have a width of 100% and 8 pixels of whitespace on top. Because we use 100% for the width of the image, the image automatically scales to the full width of questionnaire window, regardless of its size. Keep in mind: The height of the image is scaled proportionally.
- The third CSS rule, paddingPageImage declares that there should be whitespace around the image element. The padding declaration is a shorthand property and has four values: 10 pixels on top, 20 pixels on the right, 30 pixels on the bottom and 20 pixels on the left of the image. Think of it as a clock.
- The fourth rule, paddingPage declares that there should be whitespace around the content of the page itself. 10 pixels on top, 20 pixels left and right and 0 pixels on the bottom of the element. This rule is present in all the HTML templates we provide.
HTML
The HTML portion of the template is, most of the time, split up into several blocks for easy editing.
<!-- /// --- start of image block --- \\\ -->

<div class="paddingPageImage">
  <img src="https://images.cx.management/cys/cx-header-4.jpg" class="imageStyle">
</div>

<!-- \\\ --- end of image block --- /// -->
For instance, some of the templates have a HTML block specifically to show a header image on your page. The sample header image has a width of 1000 pixels and a height of 310 pixels. When you look closely at the code you see that the image element has a class attribute linking it to the imageStyle CSS rule defined at the top of the template. Because of this rule, the image automatically scales based on the window size of the device the questionnaire is opened on. If you want to change the image and want to keep the ratio, make sure your new image has the same dimensions.
If you do not want to have a header image on your page you can remove the whole block without any problem.
<!-- /// --- start of content block --- \\\ -->

<div class="paddingPage">
  Thank you for participating in this questionnaire! This helps us improve our services.
</div>

<div class="paddingPage">
  Click on the arrow below to start.
</div>

<!-- \\\ --- end of content block --- /// -->
All templates have a HTML block where the text content for the page is located. The content block contains one or more div tags which are used as a container for the text. When you look at the code you see that each div tag has a class attribute linking it to the paddingPage CSS rule at the top of the template. This creates whitespace between each div container and makes it function as a paragraph.
You can change the text into anything you want. You can do this here, but you can also import the template into your questionnaire first and do all your editing after that.
Importing a template into your questionnaire
When you are happy with the styling and the content of the template, copy the complete code and open the information page you want the template applied to.
- Click the HTML/CSS editor tab (1) in the questionnaire builder. If the HTML/CSS editor tab is not visible you can active it in Page Settings (2) on the right-hand side of your screen.
- Paste the code in the Information area.

- Click the Editor view tab (3) to view the loaded template. If you want to add or change some of text, you can do this now.
- Click the location where you want to add / change text and start editing.
- If you want to change the formatting of the text, making it bold or cursive, simply select the text and click the appropriate button in the editor.
- If you switch to the HTML/CSS editor, you will see the HTML tags applied to it.
If you want to copy/paste text from MS Word into the Information area, we recommend you switch to the HTML/CSS editor tab first and paste it there.

If you paste text from Word in the Editor tab view the questionnaire builder will also try to copy all the applied formatting from Word into your page. This could lead to unexpected and unwanted results.

Pasting it in the HTML/CSS editor tab will make sure that the text is imported as plain text.
