A dashboard filter is a powerful tool to display results. To get insights you can target specific information of your processes, stores, regions, employees etc. This article explains how to setup the dashboard filter widget. Users can apply these filters in their dashboards and see specific results.
Table of contents:
General
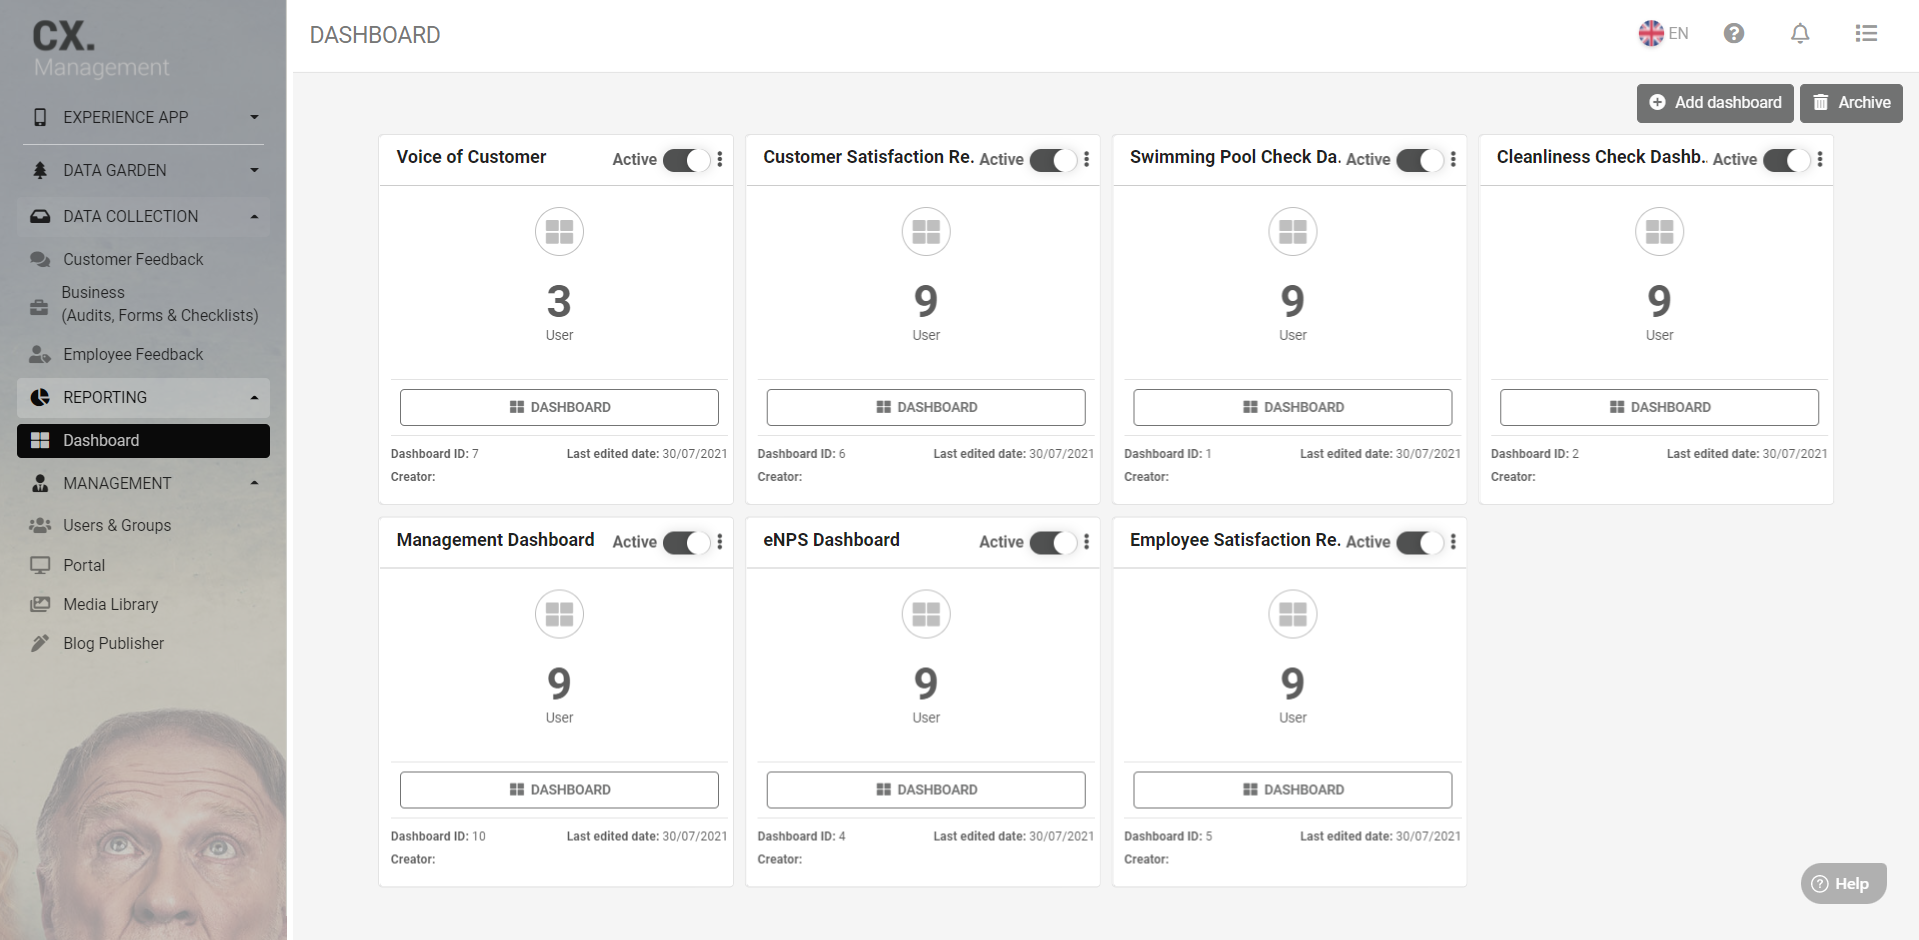
In the reporting section of your portal you can find all your dashboards.
To access follow the next steps:
- Open your portal and log in
- Click on the reporting section
- Click on Dashboard to view your dashboards
Adding a filter widget
To add a filter in your dashboard you can follow the next steps.
- Click on the dashboard button to open it

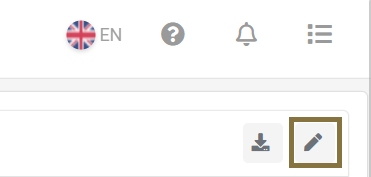
- Click on the pencil button in the right upper corner to open edit mode
- Click on the plus (1) button to open the Choose widget type
- Click on Normal widgets (2) to open the selection window

- Click on the right arrow (3) to go to the Filter widget
- Click on Select this (4) to add the filter this will open the Filter settings

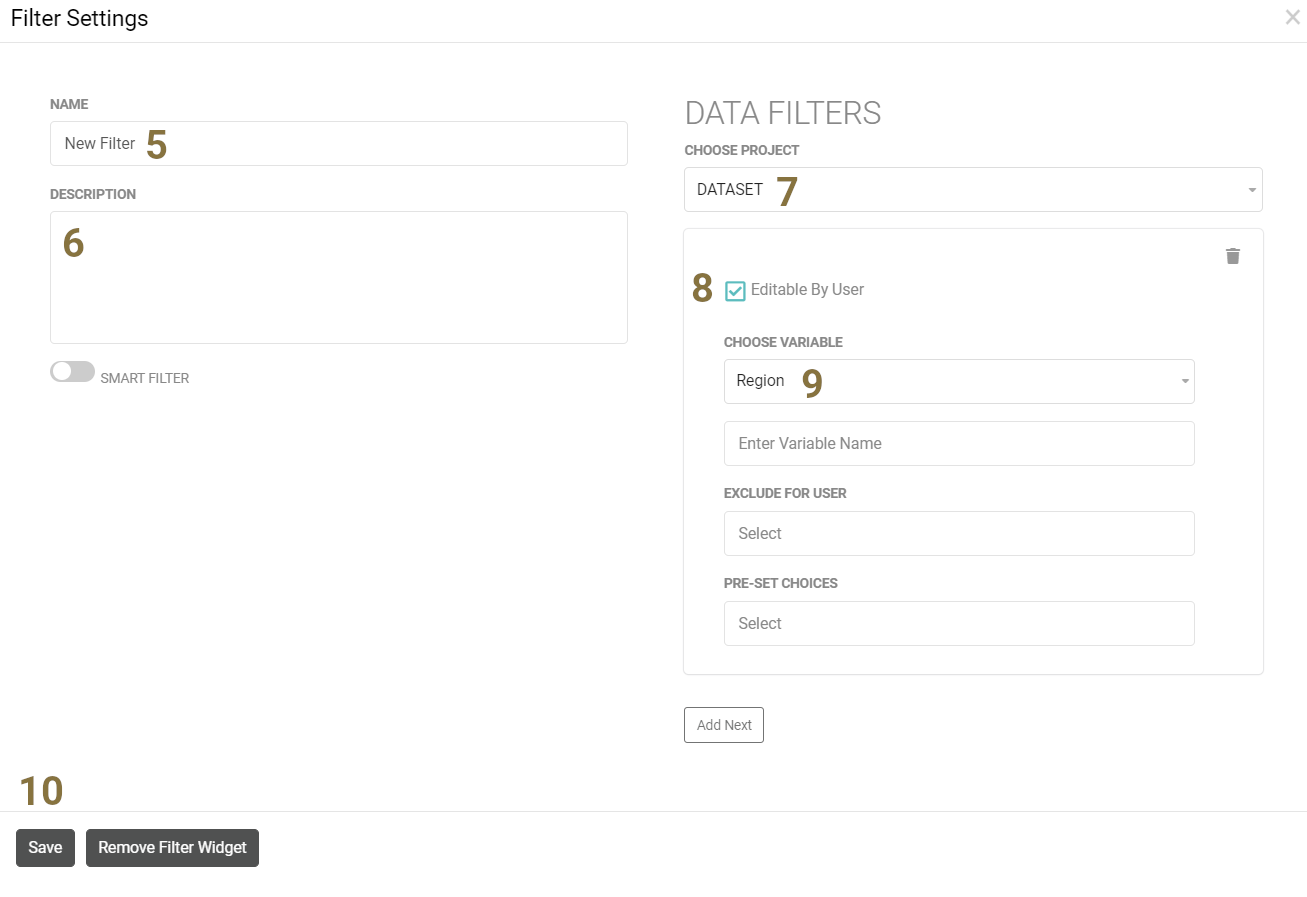
- Type a name in the Name field (5)
- Type a description in the Description field (6)
- Choose a project from the Choose project (7) drop down menu
- Tick the Editable by user (8) selection box for the user to be able to select the values of the variable
- Choose a column from the Choose variable (9) drop down menu
- Click on Save (10) to finish the setup
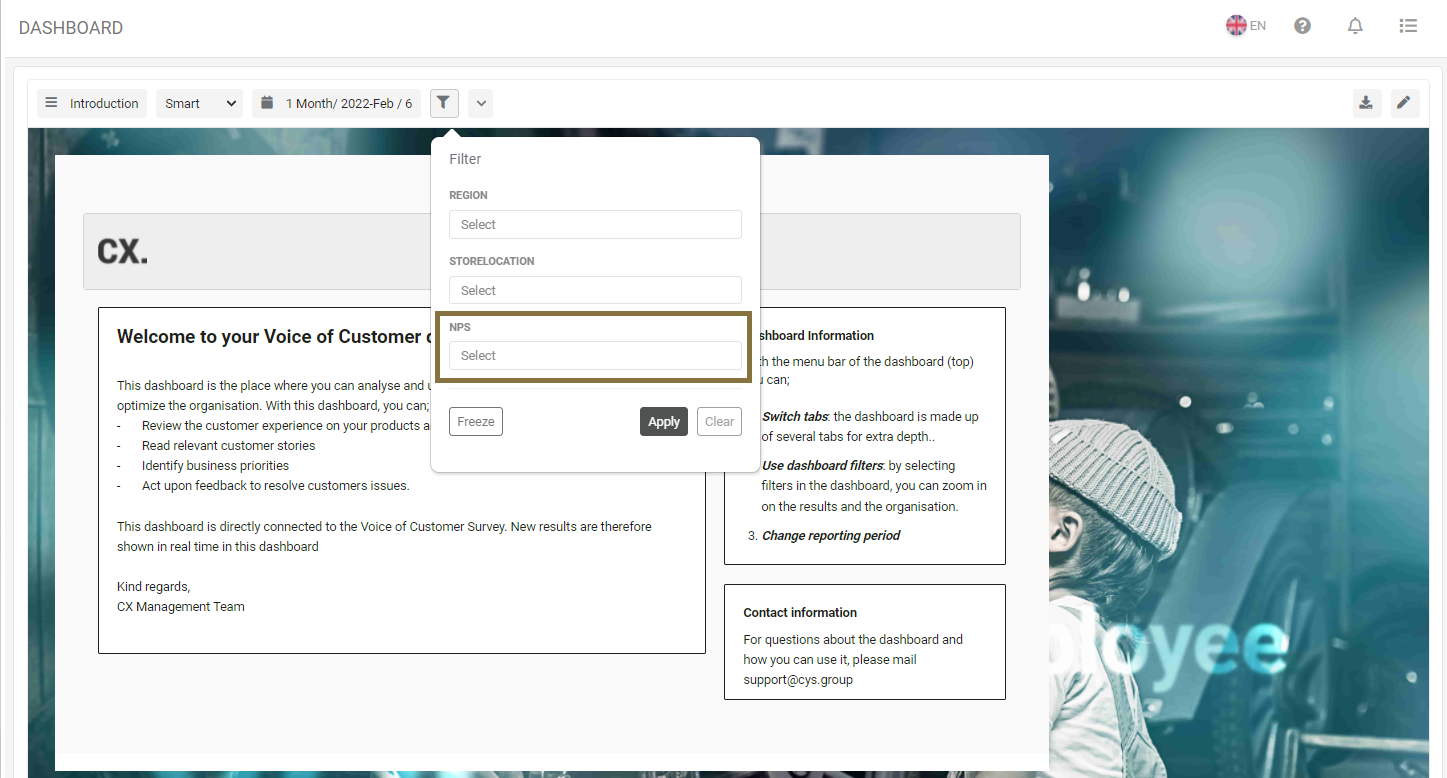
After saving your setup the filter wil be shown in the dashboard with the filter button.
- Click on the filter button (11) to open de filter window
- Click on the drop-down menu (12) to select a value you want to filter on
- Click on Apply (13) to set the filter
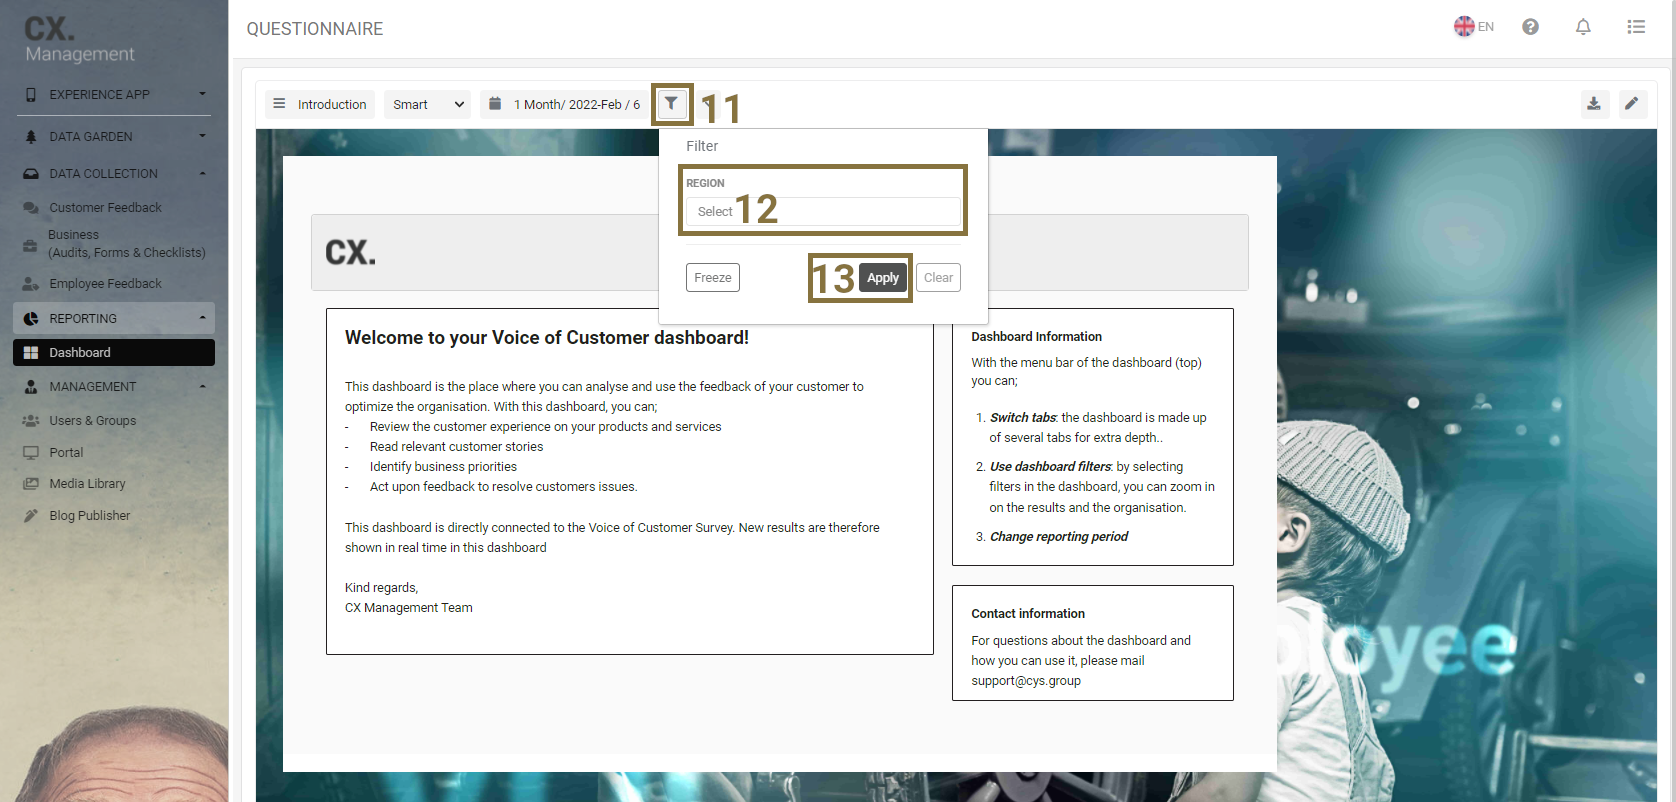
Your dashboard will now only show the relevant data of the filter you've applied.
Selecting dashboard filters
You can combine filters for a powerful selection on specific data to display.
In the previous section Adding a filter widget we explained how to go to the filter settings.
- Click on the Add Next button (1)
- Repeat the previous steps to setup the filter and save the settings
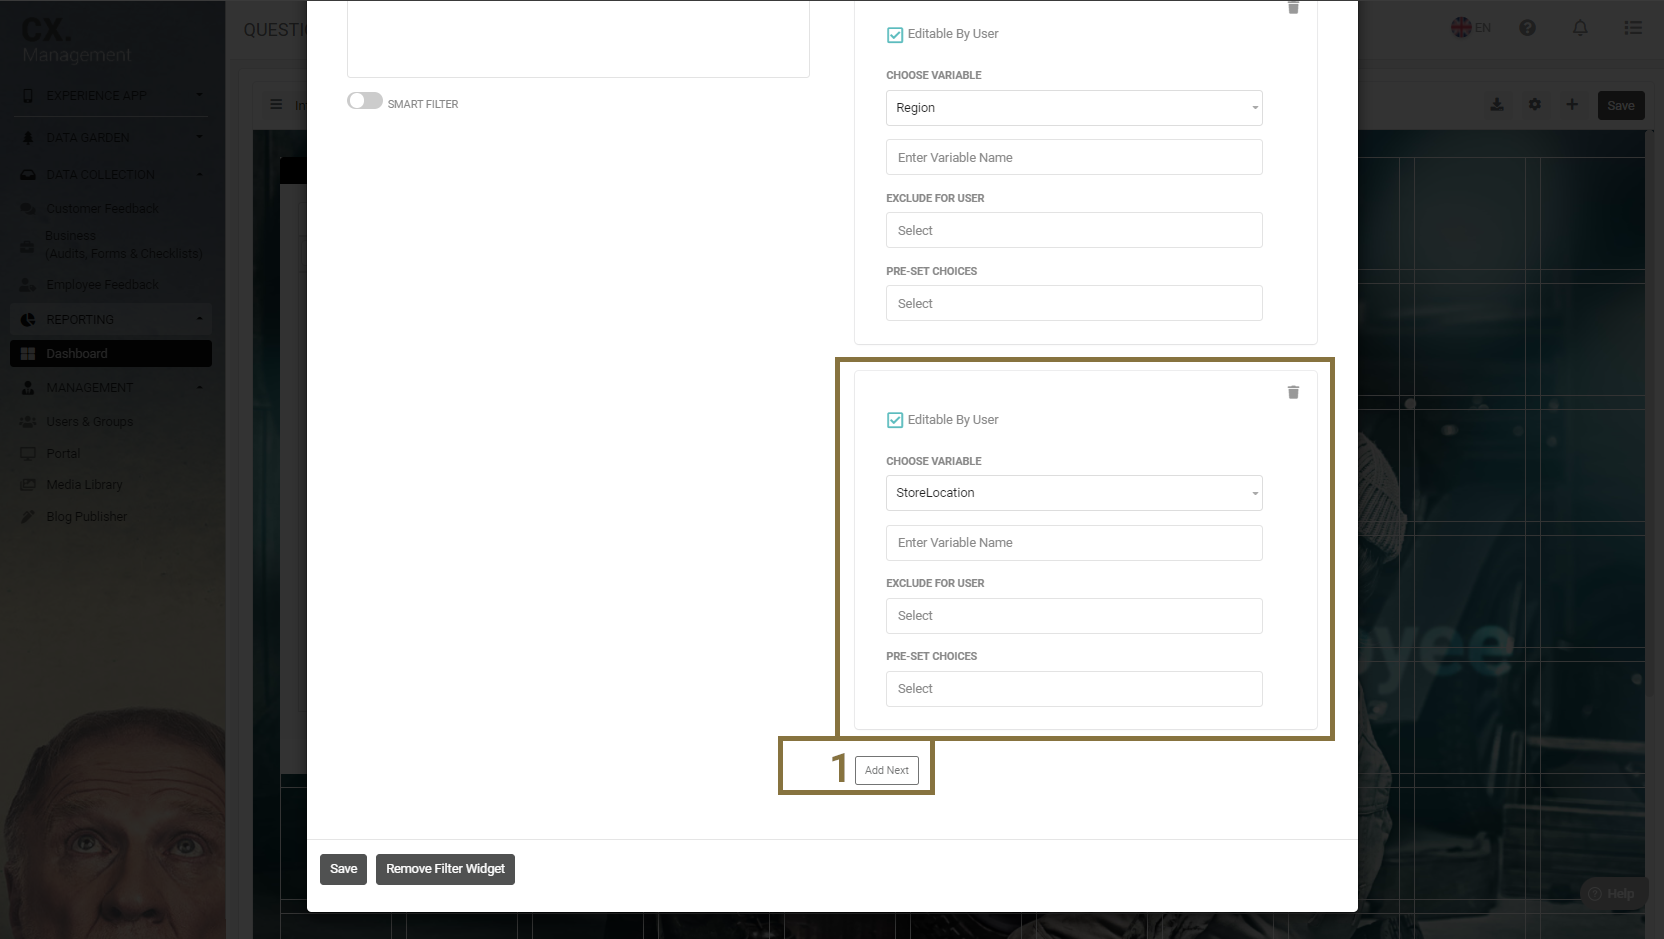
You now have multiple filters in your dashboard you can apply.

Editing your filter properties
Setting up your filters you have a couple of options.
You can set a fixed filter to the dasboard this can be handy to create a dashboard for a specific departments or regions.
You can exclude values to shorting the drop-down list for user or pre-select values to show only relevant filters.
You can also give a filter a name if you have a variable name which doesn't display a logical name.
To setup a fixed filter open the filter settings explained in the section Adding a filter widget.
This example will setup the dashboard with a fixed store location.
Follow the next steps:
- Remove the tick from Editable By User (1)
- Select a store location from the PRE-SET CHOISES (2) drop-down list to set it as a fixed filter
- Click on Save (3) to save the settings and save your dashboard

After saving your settings you now will now see a fixed filter when opening your dashboard which the dashboard user can't change. It's now always selected to this location. This can be done for any column and value.

Excluding values from your filters could be a logical thing to do. For example if you are the regional manager for the European branch you don't need to see results outside of your working area.
You can limit the selection of store locations in the filter.
Follow the next steps after opening the filter settings:
- Go to the Exclude For User section
- Click on the drop-down Select (3) and select all the values that need to be excluded
- The excluded values (4) will show as tags they can also be removed by clicking on the black cross
- After all values are select click on Save (5) and save the dasboard

Your dashboard filter wil now only show the non-excluded filter options

You can use all columns in the the database to filter results. Most of those columns have a logical name to identify the data you can filter on. Sometimes the results of your research will use a system column which has a name that isn't that logical.
For example the NPS scores will have commonly have the name Page5_text which will not be clear to users what it exactly is.
You would prefer it just to be called NPS.
Please follow the next steps to change the column name displayed in the filter.
- Choose a column from the Choose variable (6) drop down menu
- Click on Enter Variable name (7) and fill in a logical filter name
- Click on Save (8) and save the dasboard
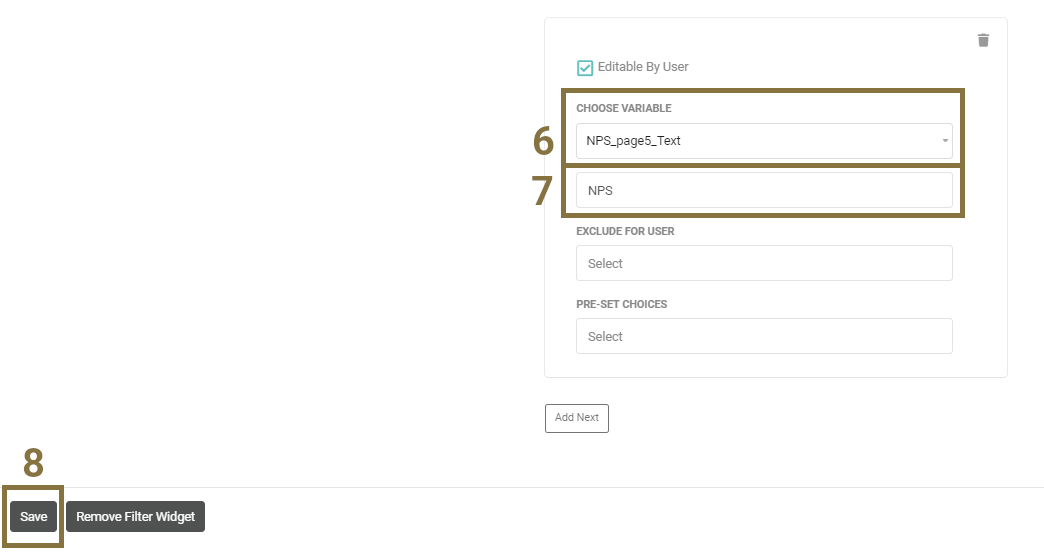
Your dashboard filter will now look display the name NPS which is much more logical then NPS_page5_Text.