In this article we will give you a short explanation on how to create a Dropbox Connector in your portal.
Note: You will need a Dropbox account already setup in order to create this connection.
You can use the Dropbox connection to upload various datafiles for use in the portal, be it a datafile of your customers to send out invites or adding additional background information, such as information about the respondent, products and/or services they purchased, to the data already present in the database.
Table of contents:
General
CYS provides 7 different ways of importing data into your portal:
- Via manual upload
- Via SFTP
- Via OneDrive
- Via Google Drive
- Via Dropbox
- Via Box
- Via an API connection
For each option you will find an explanation in our Knowledge Base. This article is about setting up the Dropbox Connection.
Adding the import source to your portal
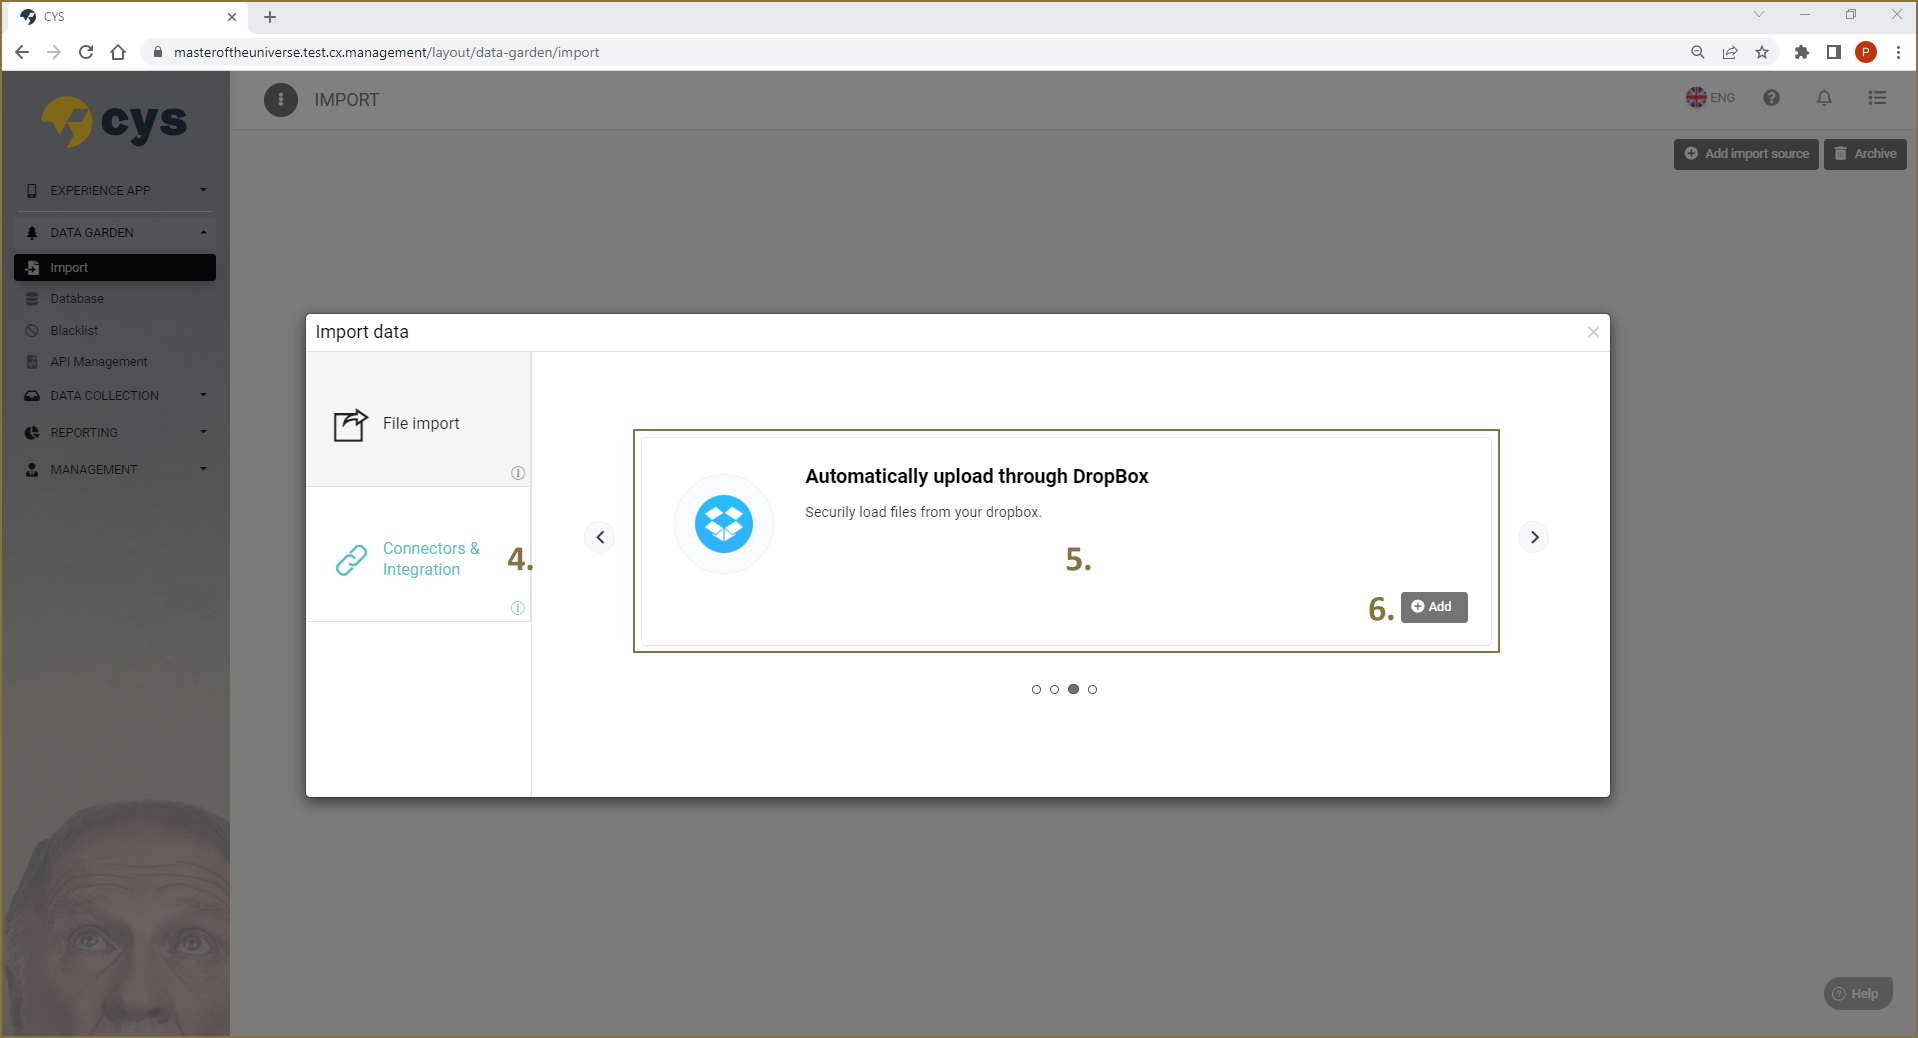
- Open your portal and in the left-hand pane click DATA GARDEN (1) to open the dropdown list.
- Click Import (2).
- Click the Add import source (3) button on the top right of your screen.

- Select Connectors & Integration (4) and use the previous / next buttons to scroll through available options.
- When you come to the Automatically upload through Dropbox (5) option, click the Add (6) button.
- A pop-up will appear where you need to enter a name for your import source. After doing so, click Add.
- The import source will be added to your portal.
- Click the EDIT IMPORT (7) button of the import source you just added.

- Click the Definitions (8) tab.
- Here you can add the columns of your datafile. You can do this manually or by uploading a sample datafile. The file can be an Excel file or a CSV file. We recommend using a sample datafile to add the columns to your import.

For more information about Setting up an import, please read the Defining the columns article.
After adding the column definitions to your import source, four new tabs will be available to you; File Sources, Rules on Import, Data View and Log (9). Click the File Sources tab. To connect your import source to Dropbox, you need to click on the Connect to Dropbox button. You are asked to sign in to your Dropbox account by using the Dropbox Integration:

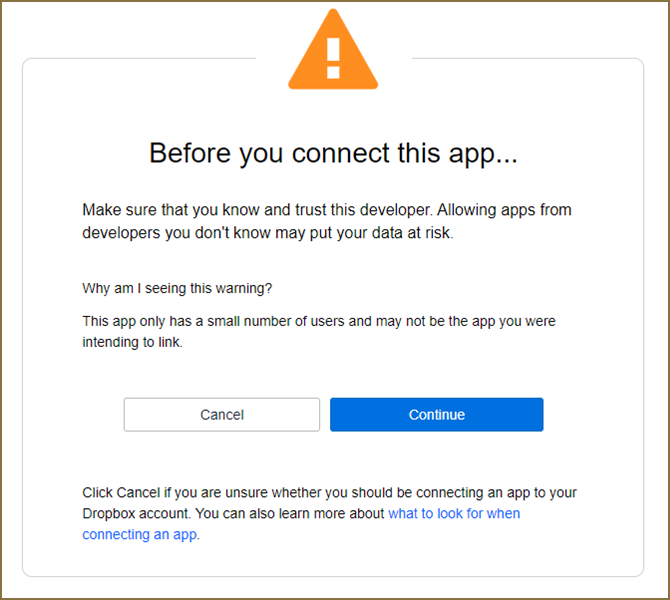
You will get a warning message if you are sure you want to provide access to your Dropbox account. Click continue.
A popup will automatically inform you on the access rights that are requested for the integration to work. You can give your permission by clicking the Allow button.

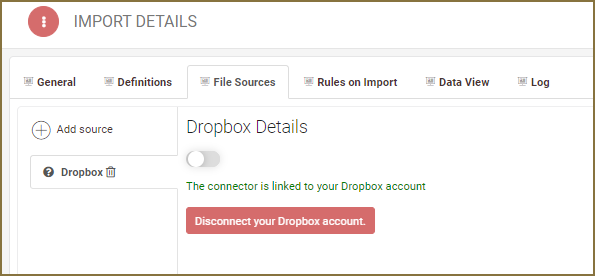
You will see a confirmation message that the import slot is connected to your Dropbox account.
Once the steps above are performed, a new folder will automatically be created within your Dropbox account. The path of the folder is Apps/CyS Data Interface. This folder should be used to place the files that can be imported. The connection will automatically check if there are new files provided, and will process them accordingly. The filename will be edited to indicate that it is processed.